
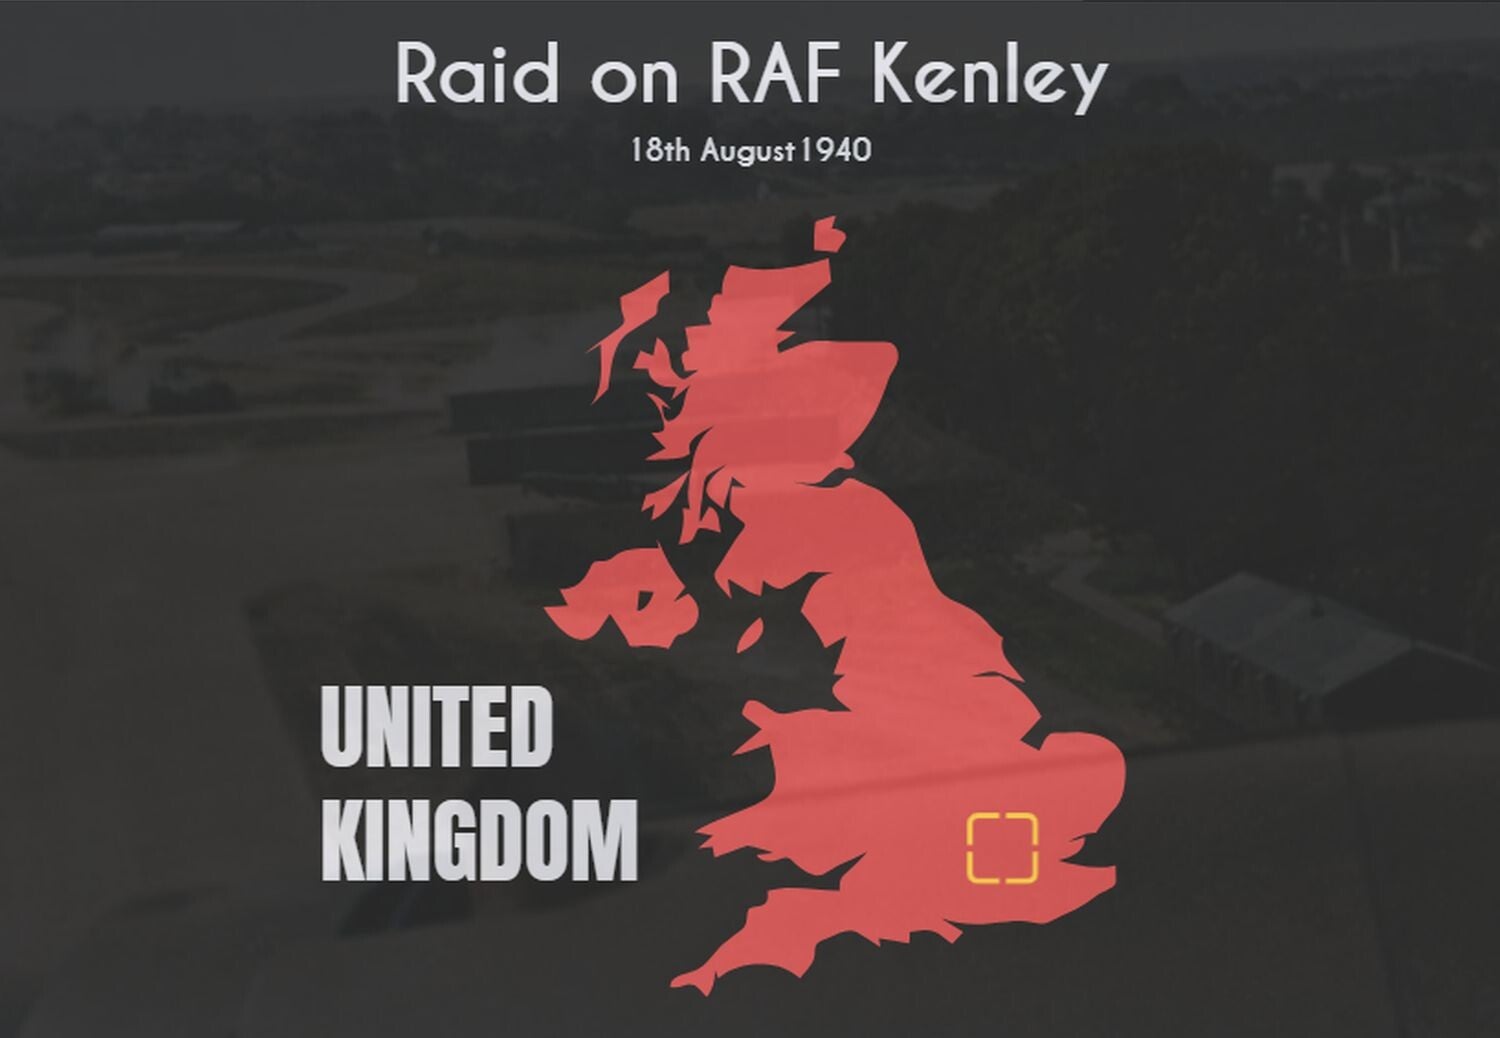
In the firing line
A cornerstone of Britain's air defence.
A crucial frontline airfield from 1917 to 1959, RAF Kenley served as a cornerstone of Britain's air defence.
Though first established for the Royal Flying Corps during the First World War, the base was radically rebuilt in 1939 to accommodate a new generation of high-performance aircraft like the Hawker Hurricane and Supermarine Spitfire.
Unsuitable old hangars were demolished to make way for modern infrastructure, including two concrete runways, a perimeter track, blast pens, and increased fuel storage.
Construction was largely completed by early 1940, just in time.

A Hawker Hurricane at Kenley RAF in 1939. That year, RAF Kenley was in a state of rapid transformation. Originally a First World War airfield, it was being radically rebuilt under the Air Ministry's authority to accommodate a new generation of high-performance aircraft like the Hawker Hurricane and Supermarine Spitfire. Its old hangars were demolished, replaced by new concrete runways and modern facilities. Construction was largely finished by early 1940, preparing the base to become a vital frontline fighter station.
The incredible history of RAF Kenley which opened 100 years ago - Croydon Advertiser
...a vital component of the capital's protective shield...

During the pivotal Battle of Britain, RAF Kenley stood as one of three main fighter stations defending London, a vital component of the capital's protective shield.
It was a frontline post, its very existence and operational status key to the survival of the nation.
It was from this base that fighters scrambled to meet the enemy, making it a primary target for the Luftwaffe and a central stage for some of the war's fiercest aerial combat.

Kenley Station operations record book with site plan, December 1939. Operations record books are a very important source of information about the RAF and its history. They were widely used to record daily and monthly events and activities, sometimes with names of personnel included. Other kinds of material, such as this sketch, were added occasionally. Kenley was a sector airfield, which meant that it controlled a group of fighter squadrons in a designated area south of London. Two squadrons were based there at the time of the attack on 18 August 1940, with a third at a satellite airfield at Croydon. The concrete runways (shown in red) had been completed in late 1939.

The Battle of Britain
The Battle of Britain was a pivotal air campaign fought in the summer and autumn of 1940.
It was the first major military campaign fought entirely by air forces and marked a crucial turning point in the Second World War.
After the fall of France, the British government, led by Winston Churchill, rejected all peace overtures from Adolf Hitler.
This refusal prompted Hitler to issue Directive No. 16, which outlined plans for Operation Sea Lion, the invasion of the United Kingdom.
However, before any amphibious landing could be attempted, the Luftwaffe had to achieve air superiority over the Royal Air Force (RAF).

British Prime Minister Winston Churchill rejected any peace agreement wit Nazi Germany.
Yassine Belhadj https://fineartamerica.com/featured/winston-churchill-color-photo-yassine-belhadj.html

Plans for Operation Sealion - Hitler's invasion of Great Britain. On "The Hardest Day," the brutal air attack on RAF Kenley was a tactical failure for the Luftwaffe, costing them valuable aircraft and crews. The failure to destroy a single sector station proved that RAF Fighter Command remained a formidable force. This unyielding defense was a key factor in compelling Adolf Hitler to postpone Operation Sea Lion, his plan to invade Britain, thereby preventing the seaborne invasion from ever taking place.
...to draw out and deplete Fighter Command...

Luftwaffe Heinkel III' bombers lined up during Adlerangriff. Adlerangriff was the German offensive to destroy the RAF and gain air superiority for a planned invasion. Beginning on the 13th August 1940, it targeted airfields, but poor coordination and intelligence led to heavy German losses, failing to achieve its goal.
Episode 49- Adlertag: August 8th-13th | The History of WWII Podcast - by Ray Harris Jr
The battle unfolded in four distinct phases. The first, - Kanalkampf -beginning in July, saw the Luftwaffe focus its attacks on British shipping in the English Channel, aiming to draw out and deplete Fighter Command.
This was followed by a shift to inland targets in August, with the Luftwaffe launching Adlerangriff (Eagle Attack) and targeting RAF airfields and infrastructure.
The third phase - the start of the Blitz, from late August to early September, became a brutal war of attrition as the Germans systematically attacked the RAF's vital sector stations, pushing Fighter Command to its limit.
The final phase saw the Luftwaffe shift its strategy to night bombing of major cities like London in an effort to break British morale. The Battle of Britain itself was essentially over although the Blitz aspect continued.

The aftermath of a Luftwaffe raid during the Blitz. The Blitz, a sustained German bombing campaign, inflicted devastating damage on British cities from September 1940. The Luftwaffe's objective was to destroy industrial areas and break civilian morale by dropping thousands of tons of high-explosive and incendiary bombs. Despite the immense destruction and terror, the raids ultimately failed to achieve their aim. The British people's resilience and defiance became a powerful symbol of their unyielding spirit.
London During the Blitz Through the Lens of American photographer William Vandivert
...maximize its limited resources...
The strategies and tactics on both sides were a study in contrast.
The Luftwaffe, led by Hermann Göring, favored large, escorted bomber formations and "free-hunting" fighter sweeps to overwhelm the RAF.
In contrast, the RAF, under the command of Air Marshal Hugh Dowding, employed a sophisticated command-and-control system known as the Dowding System, which used radar, ground observers, and radio communications to vector small, mobile fighter squadrons to intercept enemy formations.
This allowed the RAF to maximize its limited resources, keeping a reserve force to counter future attacks.
The outcome of the battle would decide the fate of Britain and, in many ways, the course of the war.

Reichsmarschall Hermann Göring, commander of the Luftwaffe.
Hermann Göring Color Photograph Foto | Buy on Tradera (520019645)

Queen Elizabeth and King George VI are seen here walking with Air Chief Marshal Sir Hugh Dowding (right) in the gardens at RAF Bentley Priory towards the Mansion House. King George VI and Queen Elizabeth visited RAF Bentley Priory, in September 1940, during the height of the Battle of Britain, when some of the most intense aerial combat was taking place. Dowding was the architect of RAF Fighter Command and Britain's air defense system. During the Battle of Britain, his genius lay in his disciplined, centralized command-and-control. Despite immense pressure, he wisely conserved his fighter squadrons, refusing to be drawn into a single, decisive battle and ensuring Britain's defense remained intact.
King George VI, Queen Elizabeth, ACM Dowding | Bentley Priory Museum

Eagle Attack
Adlerangriff (Eagle Attack) was the codename for the German air offensive's second phase, which commenced on 13th August 1940.
The German High Command believed that they had sufficiently weakened the RAF's fighter strength through the preliminary skirmishes over the English Channel.
The plan was to launch a concentrated, all-out assault to destroy RAF Fighter Command on the ground and in the air.
The German strategy was to use large formations of bombers, heavily protected by fighter escorts, to hit key RAF airfields, radar stations, and aircraft factories.
The objective was to eliminate Britain’s ability to defend itself from a subsequent invasion.


A formation of low-flying German Heinkel He 111 bombers flies over the waves of the English Channel in 1940. During Adlerangriff, German bomber tactics revolved around large, heavily escorted formations. Luftwaffe commanders believed that massed attacks would overwhelm RAF Fighter Command's defenses and destroy key airfields. They also employed "free-hunting" fighter sweeps, sending Messerschmitt Bf 109s ahead to engage British fighters and clear a path for the bombers. However, poor coordination between fighters and bombers often left the bombers vulnerable to attack.
...significant tactical blunders...

The offensive was supposed to begin on August 11, but poor weather and coordination issues led to a two-day delay.
The actual start on August 13th - Adlertag - proved to be a chaotic day for the Luftwaffe.
The main targets were RAF airfields in the southeast of England, including Biggin Hill, Kenley, and Debden.
However, a combination of bad weather, communication breakdowns, and faulty intelligence hampered the raids.
Bombers were often sent to the wrong targets, attacking satellite airfields and non-military sites instead of the crucial sector stations.
...failed to deliver a knockout blow...
The fighting that day was fierce, with both sides suffering heavy losses.
Though the Germans inflicted some damage on British airfields, their efforts were not decisive.
The RAF's command-and-control system remained intact, and the Germans failed to deliver a knockout blow.
The day ended with the Luftwaffe suffering significant losses and the realization that their intelligence and planning were deeply flawed.
Adlerangriff did not achieve its intended goal, and the war of attrition continued.

The Hardest Day
Sunday, August 18, 1940, earned its grim title, "The Hardest Day," from the sheer intensity of the air battles and the staggering losses on both sides.
Despite the failure of Adlertag, the Luftwaffe, believing it was close to victory, launched its most ferocious and concentrated attack yet.
The strategy was to deliver a knockout blow to RAF Fighter Command's vital airfields, with a specific focus on the sector stations at Kenley and Biggin Hill.
...crucially, he held back reserves...
The German plan was complex, featuring a coordinated attack of high-altitude bombers and a daring, low-level assault by a specialized bomber unit.
The main raids, consisting of hundreds of Heinkel He 111s and Dornier Do 17s, were heavily escorted by Messerschmitt Bf 109s and Bf 110s.
The Luftwaffe also used a "free-hunting" fighter tactic, sending Bf 109s ahead of the main formations to engage British fighters and clear the way for the bombers.
The RAF's tactics, meanwhile, were defensive and highly disciplined. No. 11 Group, under Air Vice-Marshal Keith Park, used its sophisticated radar and ground observer network to track the German formations.
Park scrambled squadrons to meet the enemy, but crucially, he held back reserves to ensure a continuous defence.
...proving its remarkable resilience...
The day saw furious combat across the skies of southern England.
The low-level raid on RAF Kenley, though it inflicted significant damage, was a costly failure for the Luftwaffe, which lost half of the bombers in the attack.
The most devastating aspect of the day was the damage inflicted on the ground. While the RAF shot down twice as many German aircraft in the air, many more were destroyed on their airfields, equalizing the total losses.
Despite the immense cost, the Germans failed to put a single sector station out of action. The RAF's command structure remained intact, proving its remarkable resilience.
The day's events marked a turning point; the Luftwaffe would soon change its strategy again, but it had failed to deliver the final blow.

A Daring Low-Level Assault
Six days of attacks by the Luftwaffe, with substantial losses on both sides, had been followed by an ominous silence on Saturday, 17th August, 1940, but it wasn’t to last.
The clear, sunny morning of August 18, 1940, set the stage for one of the most daring and perilous air raids of the entire Battle of Britain.
As Generalfeldmarschall Albert Kesselring directed his Luftflotte 2 to strike the vital sector stations of Kenley and Biggin Hill, the Luftwaffe planners had a bold, almost reckless, strategy for the former.
While the main bomber force would conduct a high-altitude attack, a specialized squadron of Dornier Do 17s, 9 Staffel KG 76, was chosen to execute a low-level assault, hoping to catch the British defenders completely by surprise.

Generalfeldmarschall Albert Kesselring, commander of Luftflotte 2.
https://ww2colorfarbe.blogspot.com/2016/04/generalfeldmarschall-albert-kesselring.html


A Dornier Do17-Z of the 9./KG 76, the Luftwaffe unit which attacked RAF Kenley. In 1940, the Dornier Do 17, nicknamed the "Flying Pencil," was a fast, nimble medium bomber used extensively by the Luftwaffe. Its slender fuselage made it difficult to hit, and its speed allowed it to outrun many early fighters. Though it proved effective in the early stages of the war, its lack of defensive armament and armor made it increasingly vulnerable as the Battle of Britain progressed, leading to heavy losses.
...a masterpiece of tactical imagination...

The plan was a masterpiece of tactical imagination.
The nine Do 17s, commanded by Hauptmann Joachim Roth, were to fly at wave-top height across the English Channel to evade British radar.
Making landfall at Beachy Head, they would then use the Brighton-London railway line as a navigation beacon to guide them directly to their target.
Their mission was to finish off a fighter station that was expected to be crippled by a preceding high-altitude bombing run.


An enhaced copy of a photo taken by Rolf Von Pebal, a photographer, who accompanied the Dorniers on their mission. Here, they are flying over Cyprus Rd, Burgess Hill in West Sussex at 1.09pm on route to the target - Kenley Aeordrome. People run for cover as the low-flying Dorniers streak overhead. The 4th War Reporter Detachment of the Luftwaffe had despatched eight reporters and cameramen to fly with the two Bomber Geschwaders detailed to destroy the RAF’s Fighter Command airfields in the south-east on the 18th August 1940. Two were to fly with the 9th Staffel for their low-level raid on RAF Kenley: war reporter Georg Hinze and the photographer Von Pebal.
Rolf Von Pebal, Bundesarchiv 18 August 1940 - A German Perspective | Battle of Britain | Kenley Revival
...a coordinated pincer attack was underway...
The Germans’ fatal flaw, however, was in their intelligence.
They were unaware that the British defence system was a sophisticated network of radar, ground observers, and a centralized command-and-control system.
While Roth’s unit was flying low over the water, the Royal Observer Corps Post K3 on Beachy Head, using their eyes and ears, spotted the low-flying bombers.
A warning was immediately telephoned to RAF Kenley, where Wing Commander Thomas Prickman and his controllers quickly realized a coordinated pincer attack was underway.


Two men of the Royal Observer Corps on a cliff top near Dover. The Royal Observer Corps at Beachy Head spotted the low-flying Dornier Do 17s, a feat of visual spotting that evaded German assumptions. Their warning to RAF Kenley gave the base just enough time to scramble fighters and prepare defenses, spoiling the intended surprise attack and turning the German assault into a costly failure.
THE ROYAL OBSERVER CORPS IN BRITAIN, 1943 | Imperial War Museums
...leaving the airfield vulnerable...

The formation of 9th Staffel Dornier Do.17’s as they approached RAF Kenley on the 18th August.
The attack on Kenley was now a race against time.
The main high-altitude raid was drawing British squadrons away, leaving the airfield vulnerable.
However, the controllers, on their own initiative, scrambled every available aircraft from No. 111 Squadron at RAF Croydon, which was the nearest satellite airfield.
Even unserviceable planes were flown out of the way to prevent them from being destroyed on the ground.
At 3,000 feet, the Hurricanes of No. 111 Squadron took up a position above Kenley, waiting to ambush the raiders.
...a flawless feat of navigation...

Roth, flying in the lead Do 17, had performed a flawless feat of navigation.
He brought his unit to within two minutes of the target without interception.
But as they burst over the airfield at treetop level, expecting to see a scene of destruction, they instead found themselves in a hail of fire.
The air was filled with tracer rounds from British Bofors and AAA (Anti-Aircraft Artillery) guns.


Sunday, August 18, 1940, descended into chaos as the Luftwaffe launched its concentrated assault on RAF Kenley. Poor intelligence and a chaotic form-up meant bombers were already struggling, while the RAF's superior command-and-control system allowed it to anticipate and intercept the German raids. The skies above the airfield became a maelstrom of furious dogfights, with both sides suffering heavy losses in a series of uncoordinated, brutal engagements over the vital base.
...a fiery coffin hurtling toward the ground...

Leading the formation, Roth’s aircraft was met with a hail of fire from British anti-aircraft guns. As the bomber released its deadly payload, ground fire struck its fuel tanks.
The aircraft immediately burst into flames, a fiery coffin hurtling toward the ground.
The pilot, Oberleutnant Rudolf Lamberty, fought with every ounce of his strength to keep the burning bomber under control.
In a testament to his skill and determination, he managed to guide the aircraft away from the heavily defended airfield.

Photo taken from a Dornier Do 17 attacking Kenley. On "The Hardest Day," a specialized squadron of Dornier Do 17s launched a daring low-level attack on RAF Kenley. Flying at wave-top height to evade radar, the Dorniers hoped to cripple the airfield in a surprise raid. However, a British ground observer spotted them, and anti-aircraft fire and Hurricanes from No. 111 Squadron met them as they burst over the airfield. The raid inflicted damage but was a costly failure for the Luftwaffe, which lost half of the attacking aircraft.
Asisbiz Dornier Do 17s attacking Kenley during the Battle of Britain 1940-01
...the crippled Dornier passed overhead.

Close by, Captain Clarke of the Addington Home Guard – witnessing the attack on the airfield - gave the order for rapid fire, and the twenty men under his command raised their newly issued rifles.
As the crippled Dornier passed overhead, they unleashed a volley of shots.
The bomber staggered in the sky, losing precious height, its fate sealed by the determined fire of the men below.
In a desperate final attempt to save the crew, Lamberty crash-landed the blazing Dornier at Leaves Green in Kent.
The impact was catastrophic, but Lamberty survived, albeit with severe burns.
Tragically, Hauptmann Roth, the brilliant navigator who had led them on this perilous journey, was killed on impact.
He was the first of many to fall that day.

The wreckage of Roth and Lamberty’s Dornier Do.17Z-2, at Leaves Green, near Biggin Hill. After navigating his unit perfectly to RAF Kenley, Hauptmann Joachim Roth’s Dornier Do 17 was hit by ground fire. Trailing fire and smoke, the crippled bomber crash-landed at Leaves Green, killing Roth on impact. The pilot, Oberleutnant Rudolf Lamberty, miraculously survived with severe burns. The bomber, once the symbol of a daring raid, was now a shattered wreck, its fiery crash a testament to the risks of the low-level attack.
...a new and terrifying British defensive weapon...

Among the following bombers, Feldwebel Johannes Petersen’s Dornier had already been hit and was flying on fire, a symbol of its crew’s stubborn resolve.
However, their flight was destined for a violent and unexpected end.
As they flew low over the northern boundary of the airfield, they flew directly into a new and terrifying British defensive weapon.
Aircraftman D. Roberts had fired his parachute-and-cable launchers, sending rockets with long wires into the air.

...a single, horrifying moment...

Petersen's flaming Dornier flew straight into one of the cables.
The wire snagged the aircraft, and in a brutal instant, the weight of the parachute and cable dragged the bomber out of the sky.
The Dornier was pulled down, smashing into the ground and exploding.
In a single, horrifying moment, the lives of all five crewmen were snuffed out.
There were no survivors. It was a stark and final warning that no part of the airfield was safe.

The wreckage of Dornier Do.17z-2 (F1+HT), after it was brought down by Kenley’s Parachute and Cable system, killing all on board. RAF Kenley’s defenses included a rudimentary but effective parachute-and-cable system. As the German Dornier Do 17s approached at low altitude, rockets were fired, deploying long cables into their path. The already-damaged Dornier Do.17 - commanded by Feldwebel Johannes Petersen - flew directly into a cable. The wire snagged the aircraft, dragging it out of the sky in a horrifying, fiery crash that killed the entire crew and proved the effectiveness of this unique ground defence.
...a moment of incredible heroism...


Jim Crofts, an RAF Controller, was stationed at Kenley in August 1940 and survived the German attack.
BBC - WW2 People's War - “All hell let loose” at RAF Station Kenley August 1940
Other crews were equally battered but found themselves in less final straits. Oberleutnant Hermann Magin’s Dornier was also hit by ground fire as it roared over the airfield.
The pilot was critically wounded, slumping over the controls. In a moment of incredible heroism, the 28-year-old navigator, Wilhelm-Friedrich Illg, took control of the crippled aircraft.
With the pilot barely conscious, Illg navigated the bomber through the storm of fire, pulling it up and away from the chaos.
He then made the gut-wrenching decision to order the crew to abandon the aircraft, saving their lives.
For his quick thinking and courage under fire, Illg was later awarded the Knight’s Cross of the Iron Cross, a rare and distinguished honour for a non-pilot.
Oberleutnant Magin, however, died of his wounds shortly after the mission.

Aircrew including fighter pilots were required to complete a brief combat report after each engagement with enemy aircraft. In this example, Sergeant Wallace of 111 Squadron flew in his Hurricane from the satellite airfield at Croydon and met the low-level bombers near Kenley. He included a short account of the action, identifying the German aircraft type, altitude and time of day.
The Battle of Britain's 'hardest day' - The National Archives
...a scene of chaos...

Similarly, Günter Unger’s Dornier was a scene of chaos. His starboard engine was knocked out, but he pressed on, determined to deliver his payload.
The crew watched as his bombs successfully destroyed three hangars. He then found himself in a dogfight with a Hurricane flown by Harry Newton.
Though Newton was shot down, his frustrated final burst of machine gun fire struck the Dornier, which was now bleeding black smoke and losing speed.
In a heroic display of piloting skill, Unger nursed his crippled aircraft away from the battle.
His crew, battered and shaken, would live to fly another day.
...now facing a new enemy...

The chaos over Kenley marked the end of the mission, but not the end of the fight.
With the raid a costly tactical failure, the remaining Dorniers of 9 Staffel began their desperate retreat.
Every single aircraft had been hit and damaged to some degree, but for a few, the peril had just begun.
Two of the bombers that had survived the hail of anti-aircraft fire and the pursuing Hurricanes were now facing a new enemy: mechanical failure.
...the final, jarring moments...

Crippled and with their engines faltering, they had no choice but to attempt a crash-landing on the beaches of France.
The crews braced for impact, hoping to survive the final, jarring moments of their mission.
For two other Dorniers, the situation was even more dire.
Their damage was too great, and as their engines sputtered and died over the English Channel, the pilots were forced to ditch into the sea.
Their crews clambered into their life rafts, desperately waiting to be picked up by Kriegsmarine rescue ships, hoping their ordeal was not yet over.
Only three of the nine Dorniers limped back to their base, battered and shot full of holes, their crews exhausted and shaken.
They had survived, but their victory was in the simple fact that they had returned at all.

A damaged RAF Hurricane fighter after the Luftwaffe attack on RAF Kenley. While a number of Hurricanes from No. 111 Squadron were scrambled to meet the German attack on RAF Kenley, it was the aircraft on the ground that suffered the most. The low-level assault by the Dornier Do 17s was designed to destroy the fighters before they could get airborne. The raiders succeeded in destroying at least eight Hurricanes, a testament to the brutal effectiveness of the surprise assault. However, this came at a heavy cost to the Luftwaffe squadron.
Kenley's 'Hardest Day' - An Introduction and list of Casualties | Battle of Britain | Kenley Revival
...the catastrophic losses it incurred...

The low-level raid, while inflicting serious damage - destroying three hangars and eight Hurricanes on the ground - was a costly failure for the Luftwaffe.
Of the nine Do 17s that took part, four were lost and two were damaged in crash landings.
The commander, Hauptmann Roth, was among the dead.
The raid, and the catastrophic losses it incurred, were a brutal lesson that would lead the Luftwaffe to abandon this tactic for the rest of the battle.
The attack on Kenley, despite its ferocity, ultimately failed to put the airfield out of commission for more than two hours, a testament to the remarkable resilience of the British defense system on "The Hardest Day."

This page from the station operations record book summarises the attack on Kenley, which lasted only a few minutes altogether. The first German bomber squadron to reach the target flew at very low altitude from the coast near Beachy Head, in an attempt to avoid detection. The remainder of the aircraft followed at a higher altitude. Both forces suffered losses to British fighters as well as the ground defences on the airfield. The results of the attacks were noted, including personnel casualties and damage to buildings.

Aftermath and Assessment
As the smoke cleared from RAF Kenley, the full extent of the damage was revealed.
The low-level raid by 9 Staffel KG 76 had inflicted a brutal, close-quarters blow.
At least three hangars lay in ruins, along with several other key buildings.
Eight Hurricanes were destroyed on the ground, a testament to the ferocity of the assault.
Yet, despite the destruction, the raid was a tactical failure for the Luftwaffe.


This document includes a brief account of the overall activity on 18 August and names the targets attacked by German aircraft, including those at Kenley. Actual German aircraft losses on the day were about 69, lower than the number claimed here ('125 destroyed').
The Battle of Britain's 'hardest day' - The National Archives

A pall of smoke can be seen after the Luftwaffe attack on Kenley Airfield on the 18th August 1940. The brutal attack had a profound impact on the surrounding areas. The low-level raid saw German bombers flying at treetop height over civilian homes, bringing the war directly to the streets of Coulsdon and Whyteleafe. The sound of the explosions, the sight of the burning hangars, and the constant air battles over the nearby fields shattered the tranquility of suburban life and served as a stark, terrifying reminder of the war's new proximity.
...had been decimated...

The bomber force had been decimated, losing half of its aircraft in the daring attack.
More importantly, the airfield was out of action for only two hours.
By the end of the day, with just one hangar still operational, Kenley was a battered and bruised base, but it was still a fighting force.
The sector operations room, the nerve center of the airfield, had survived, a fact the Germans were not even aware of.
The low-level tactic, which had proven so costly for 9 Staffel, was immediately abandoned by the Luftwaffe for the rest of the campaign.

A photo of the smoke rising over RAF Kenley as the hangars burnt after the raids on the 18th August 1940.
...a brutal but necessary education...
The lessons learned at Kenley and across southern England on August 18, 1940, were a brutal but necessary education for both sides.
The Luftwaffe's tactical choices were deeply flawed. Luftflotte 3 wasted its efforts on targets of little strategic value, such as Coastal Command airfields, due to a profound lack of intelligence.
Its vulnerable Ju 87 Stukas were left exposed by their escorting fighters, leading to catastrophic losses.
The Germans also failed to destroy the RAF's operational capacity on the ground.
Despite the heavy bombing, the RAF's superior Dowding System ensured that its fighters were airborne before the bombers arrived, leaving the Germans to strike empty hangars and runways.
In the end, while the day was the costliest of the entire battle for both air forces, it did not achieve a strategic victory for the Luftwaffe.
The RAF had demonstrated that its complex defense system was resilient and adaptable.
The Luftwaffe had suffered unsustainable losses and was forced to change its tactics yet again.
The Germans had learned that an air campaign of attrition was not enough to break the British will. The Battle of Britain would continue, but the unyielding defence of "The Hardest Day" had fundamentally shifted its course.

Some ground personnel and aircrew were killed and wounded in the attack on Kenley Airfield. This page is part of a casualty report and has a list of four of the wounded men who survived.
The Battle of Britain's 'hardest day' - The National Archives

This report, from the same Air Historical Branch document discusses the events and results of the attack on Kenley in more detail. It summarises the attack and identifies the RAF squadrons that were sent to intercept the German bombers. There are some figures for the number of personnel killed and wounded, and the number of British aircraft destroyed or damaged. Abbreviations used include: AA: Anti-Aircraft, EA: Enemy Aircraft, PAC: Parachute and Cable (a device used to bring down enemy aircraft).
The Battle of Britain's 'hardest day' - The National Archives

Further reading


